"I put electricity into my Hyundai Kona Electric, so why can't I take it back out?"
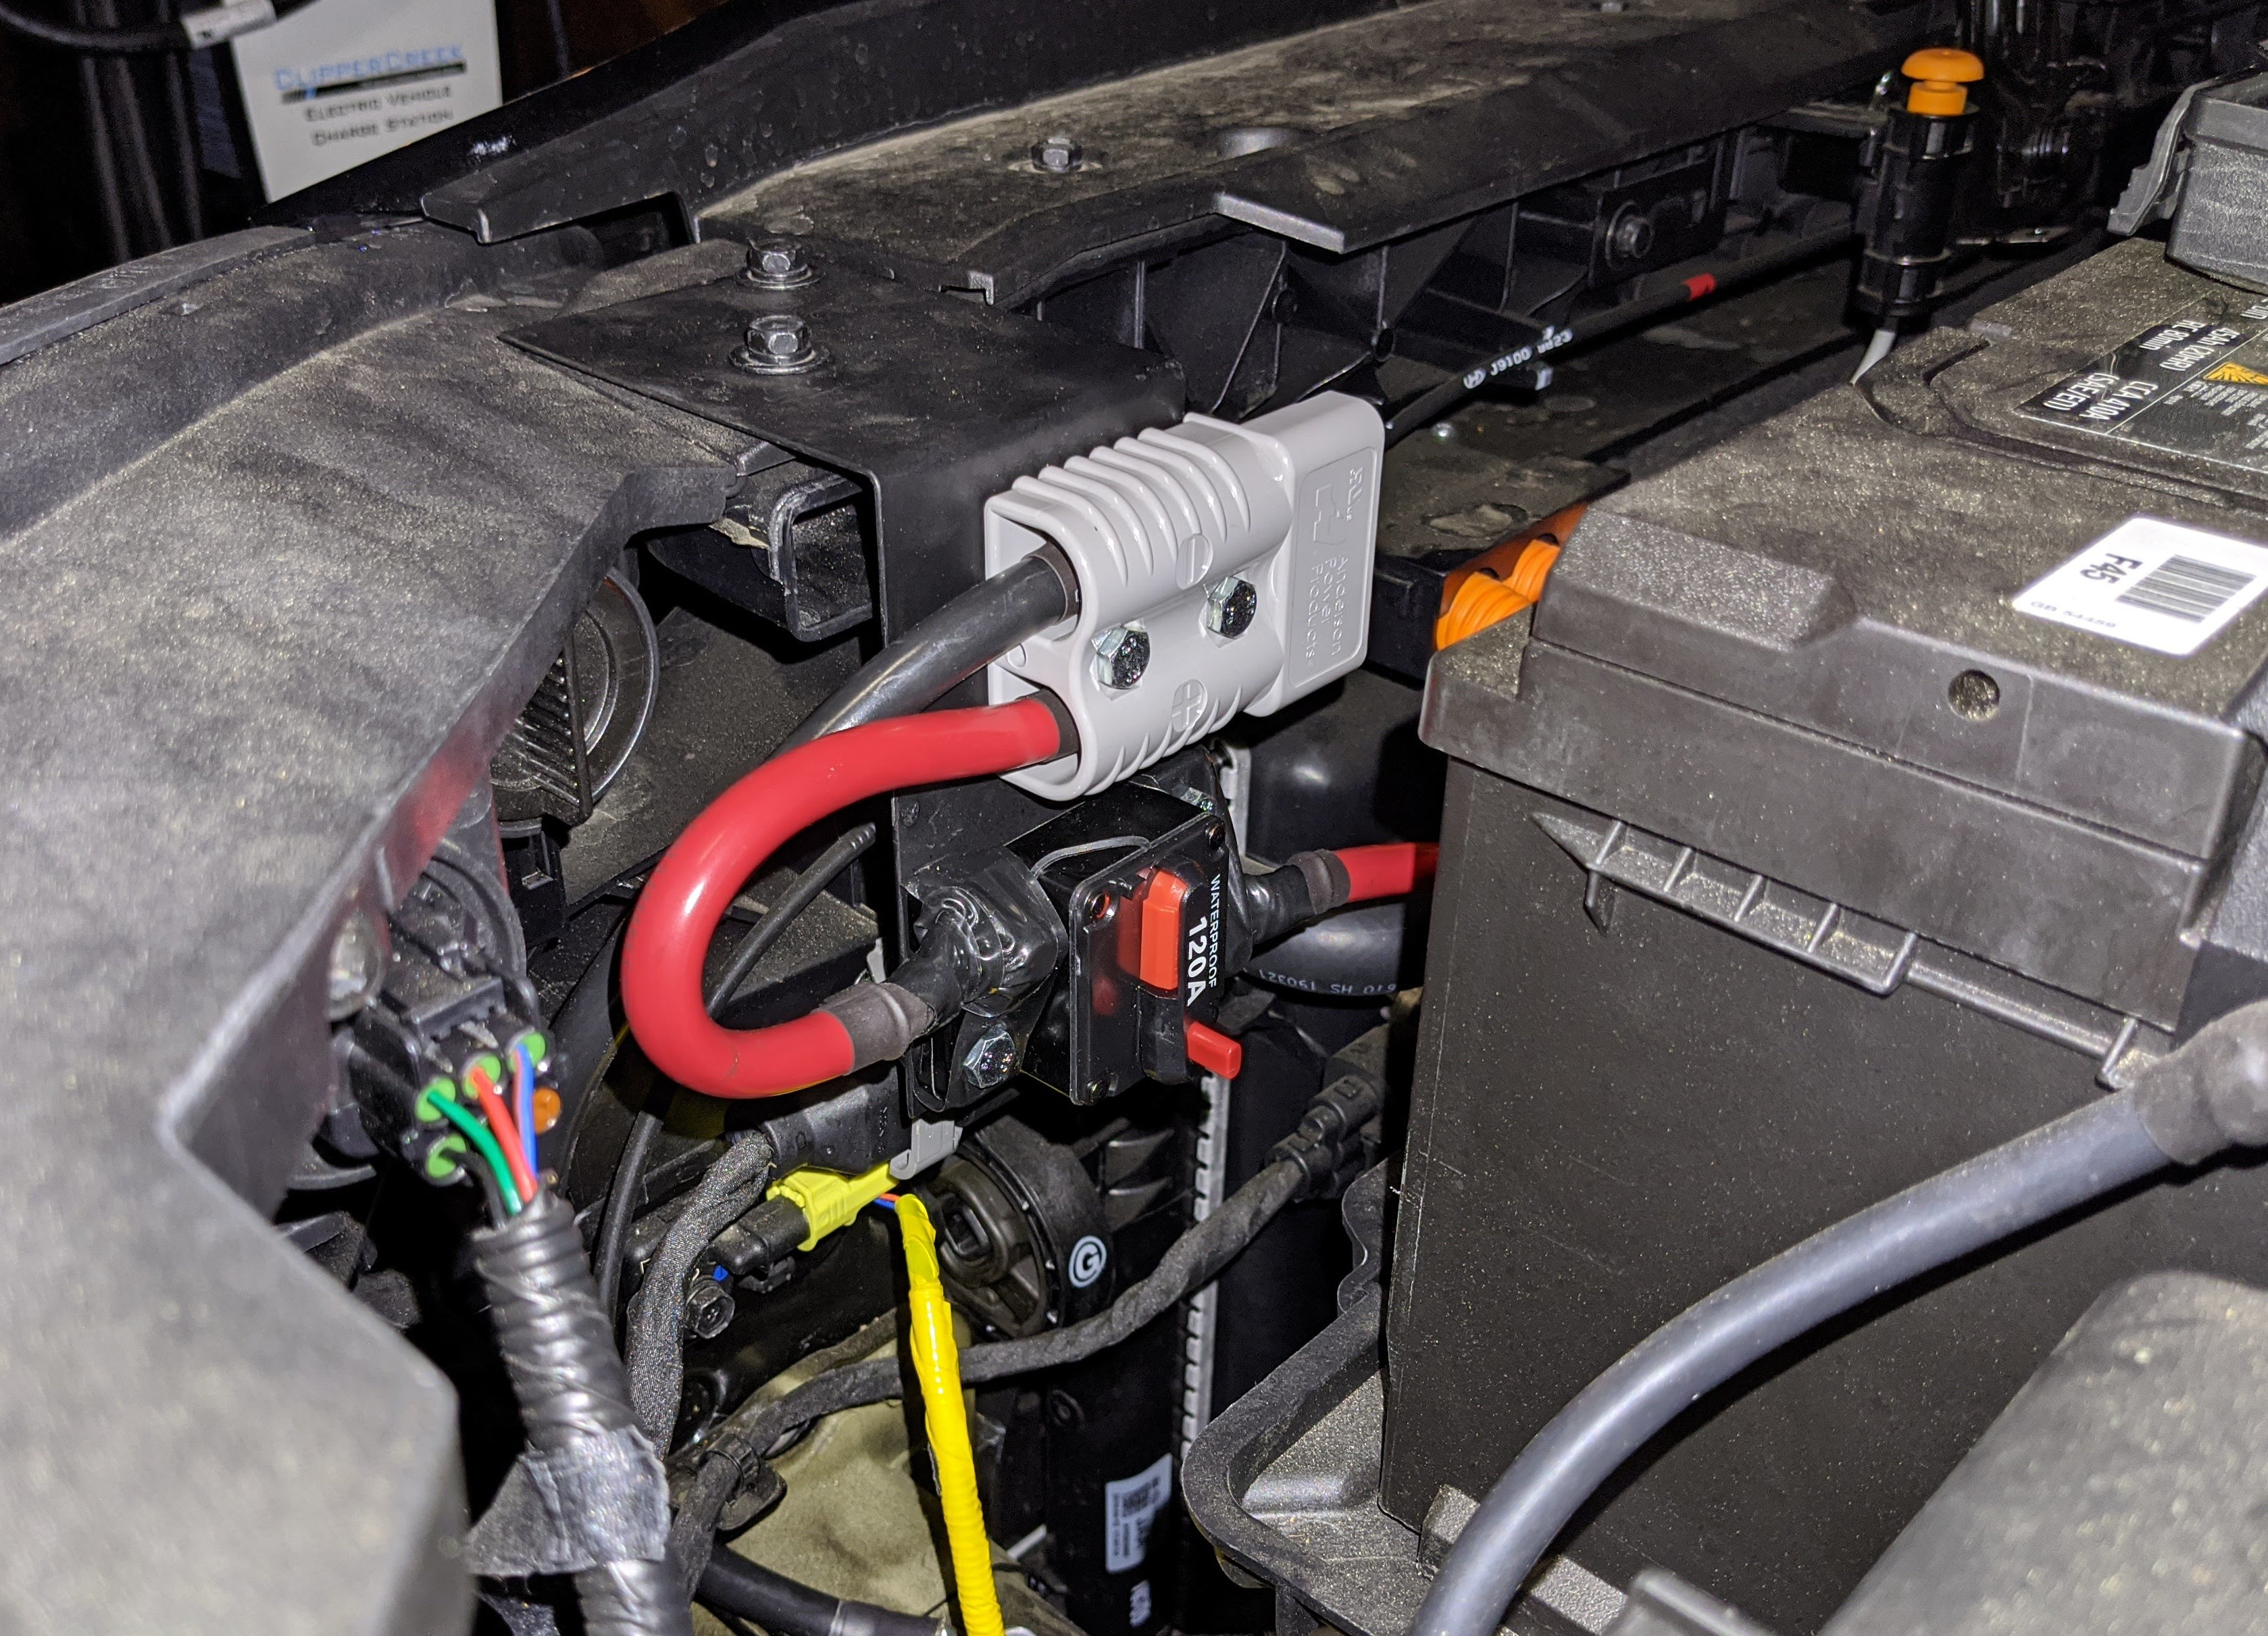
I mounted an Anderson SB175 connector with a 120A circuit breaker under the hood of my Kona EV, near the auxiliary battery. The parts are readily available on the Internet, assembled using basic tools, and require no permanent modification to the vehicle.
Disclaimer
- Electricity is dangerous.
- Cars are expensive.
- Proceed at your own risk!
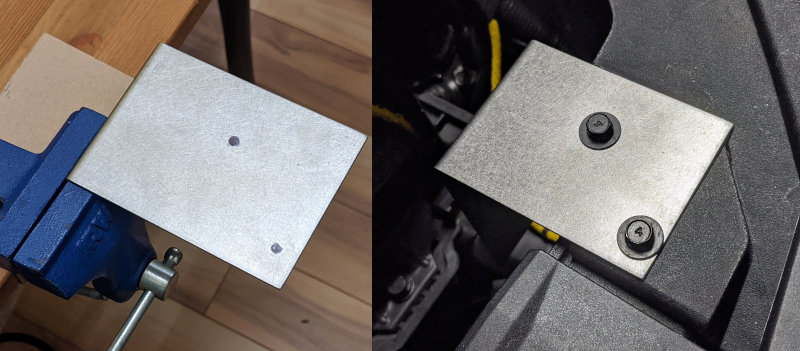
Attachment Points
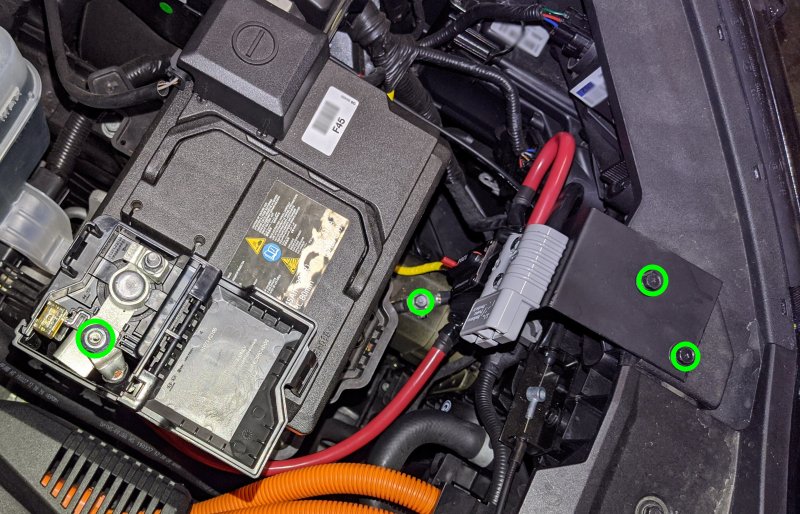
There are two 10mm hex bolts near the hood latch, providing structural support. Power is delivered through two 5/16" lugs attached to 12mm hex bolts on the battery and frame.
Parts List
- Custom metal bracket (see below)
- 120A car/boat circuit breaker (74x49 mm)
- Gray Anderson SB175 connectors (x2)
- M6 20mm bolts (x2) for breaker
- M6 30mm bolts (x2) for power connector
- M6 washers (x4)
- M6 nylon insert lock nuts (x4)
- 2AWG 1/4" lugs (x2) for breaker
- 2AWG 5/16" lugs (x2) for car (one requires bending & notching)
- Your inverter likely needs two more 5/16" lugs
- 2AWG wire: 750 mm red, 450 mm black, plus however long your inverter cord will be
- 1/2" heat shrink tubing
- Black spray paint with rust protection
I got everything from eBay, or a local hardware store. The total cost of parts was less than $150.
Tools Used
- Drill and 1/4" bit
- 6-50mm² hex crimper
- Mini vice
- Pliers
- Hacksaw or beefy wire cutters
- Utility knife
- Small file
- 10mm and 12mm wrenches or sockets
- Hair dryer / lighter / heat gun for heat shrink
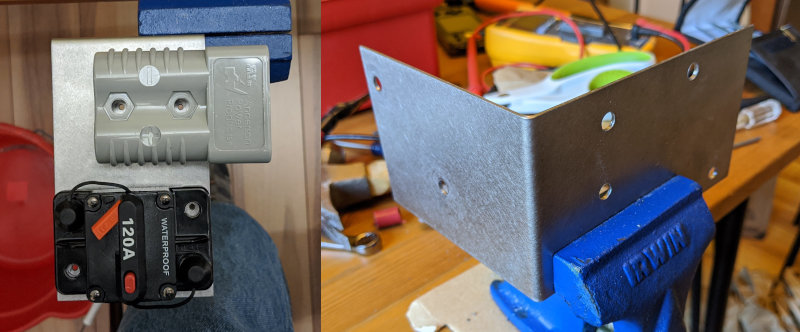
Metal Bracket
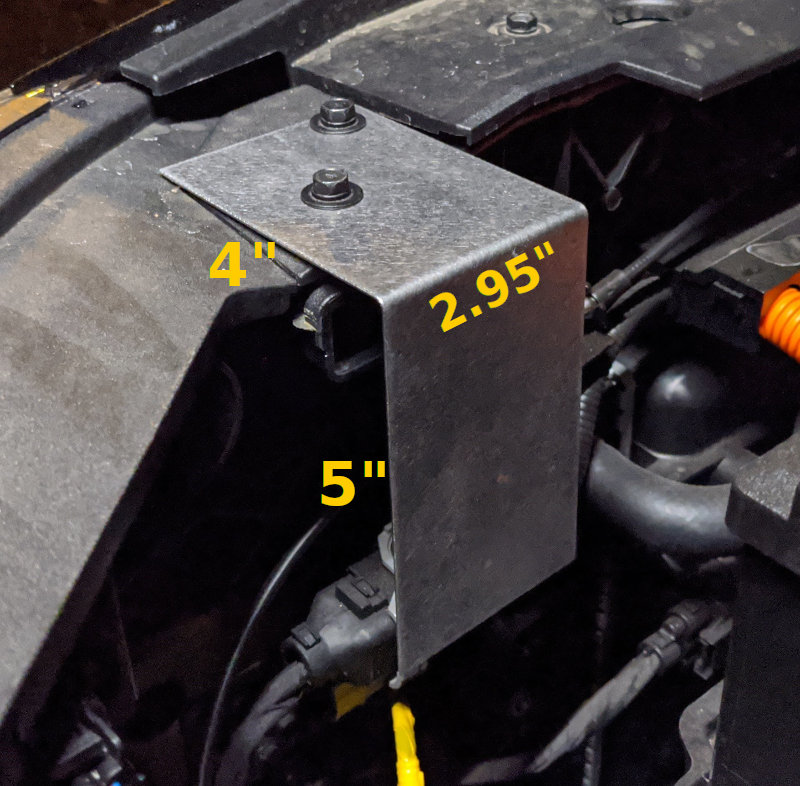
I didn't see a convenient place to directly mount a connector, so I ordered a sheet metal bracket from MetalsCut4U. The total cost was under $40, and it arrived in about a month. You can get the part from anywhere; just follow these specs:
| Spec | Value | Comment |
|---|---|---|
| Material: | Carbon Steel | it's easy to drill and paint |
| Surface: | Mill Finish / Plain | |
| Thickness: | Gauge 16, 1/16" | seems thick enough |
| Shape: | Angle | |
| Side A: | 5" | ~125 mm, points "down", precision isn't important |
| Side B: | 4" | ~100 mm, points "forward", precision isn't important |
| Length: | 2.95" | 75 mm, just wider than the 74x49 mm circuit breaker |
| Angle: | 90 degrees | |
| Cosmetic Side: | Outside |
I drilled a total of six 1/4" holes, for M6 bolts: two each for the mounting point, plug, and circuit breaker (the above photo only shows the first two.)
Mounting Hole Alignment
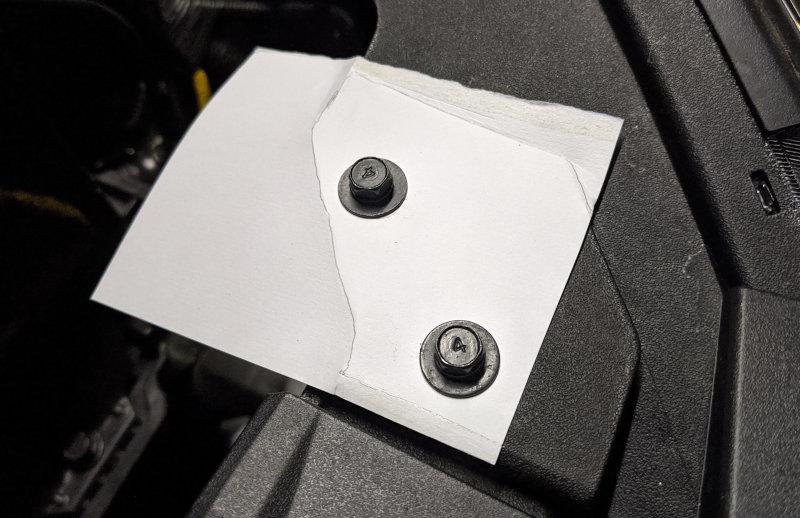
These steps should help when drilling the mounting holes:
- Get a piece of paper and draw two dots exactly 50 mm apart.
- Remove the two bolts from the car, poke them through at the dots, and bolt down the paper.
- Trace the area with a pencil, forming a template.
- When positioning the template over the bracket, use a Sharpie to color in the holes.
For the remaining holes, there's no magic. Just arrange the plug and circuit breaker so they look nice. I hung the connector over the edge for ease of access:
Choice of Components
I picked a 120A breaker because it's smaller than the Kona's 150A MAIN/LDC fuse, and pretty close to the practical limit of ~1300W inverter output. 120A is also a good match for 2AWG copper wire.
The gray Anderson SB175 connector just seemed popular for inverters. The smaller SB120 should work equally well.
This project works with any 12V inverter, but I'm using the Xantrex PROwatt SW 1000 because it includes a voltmeter/wattmeter and a GFCI. With a 120A breaker, there's little point in going much beyond 1000W.
Wiring
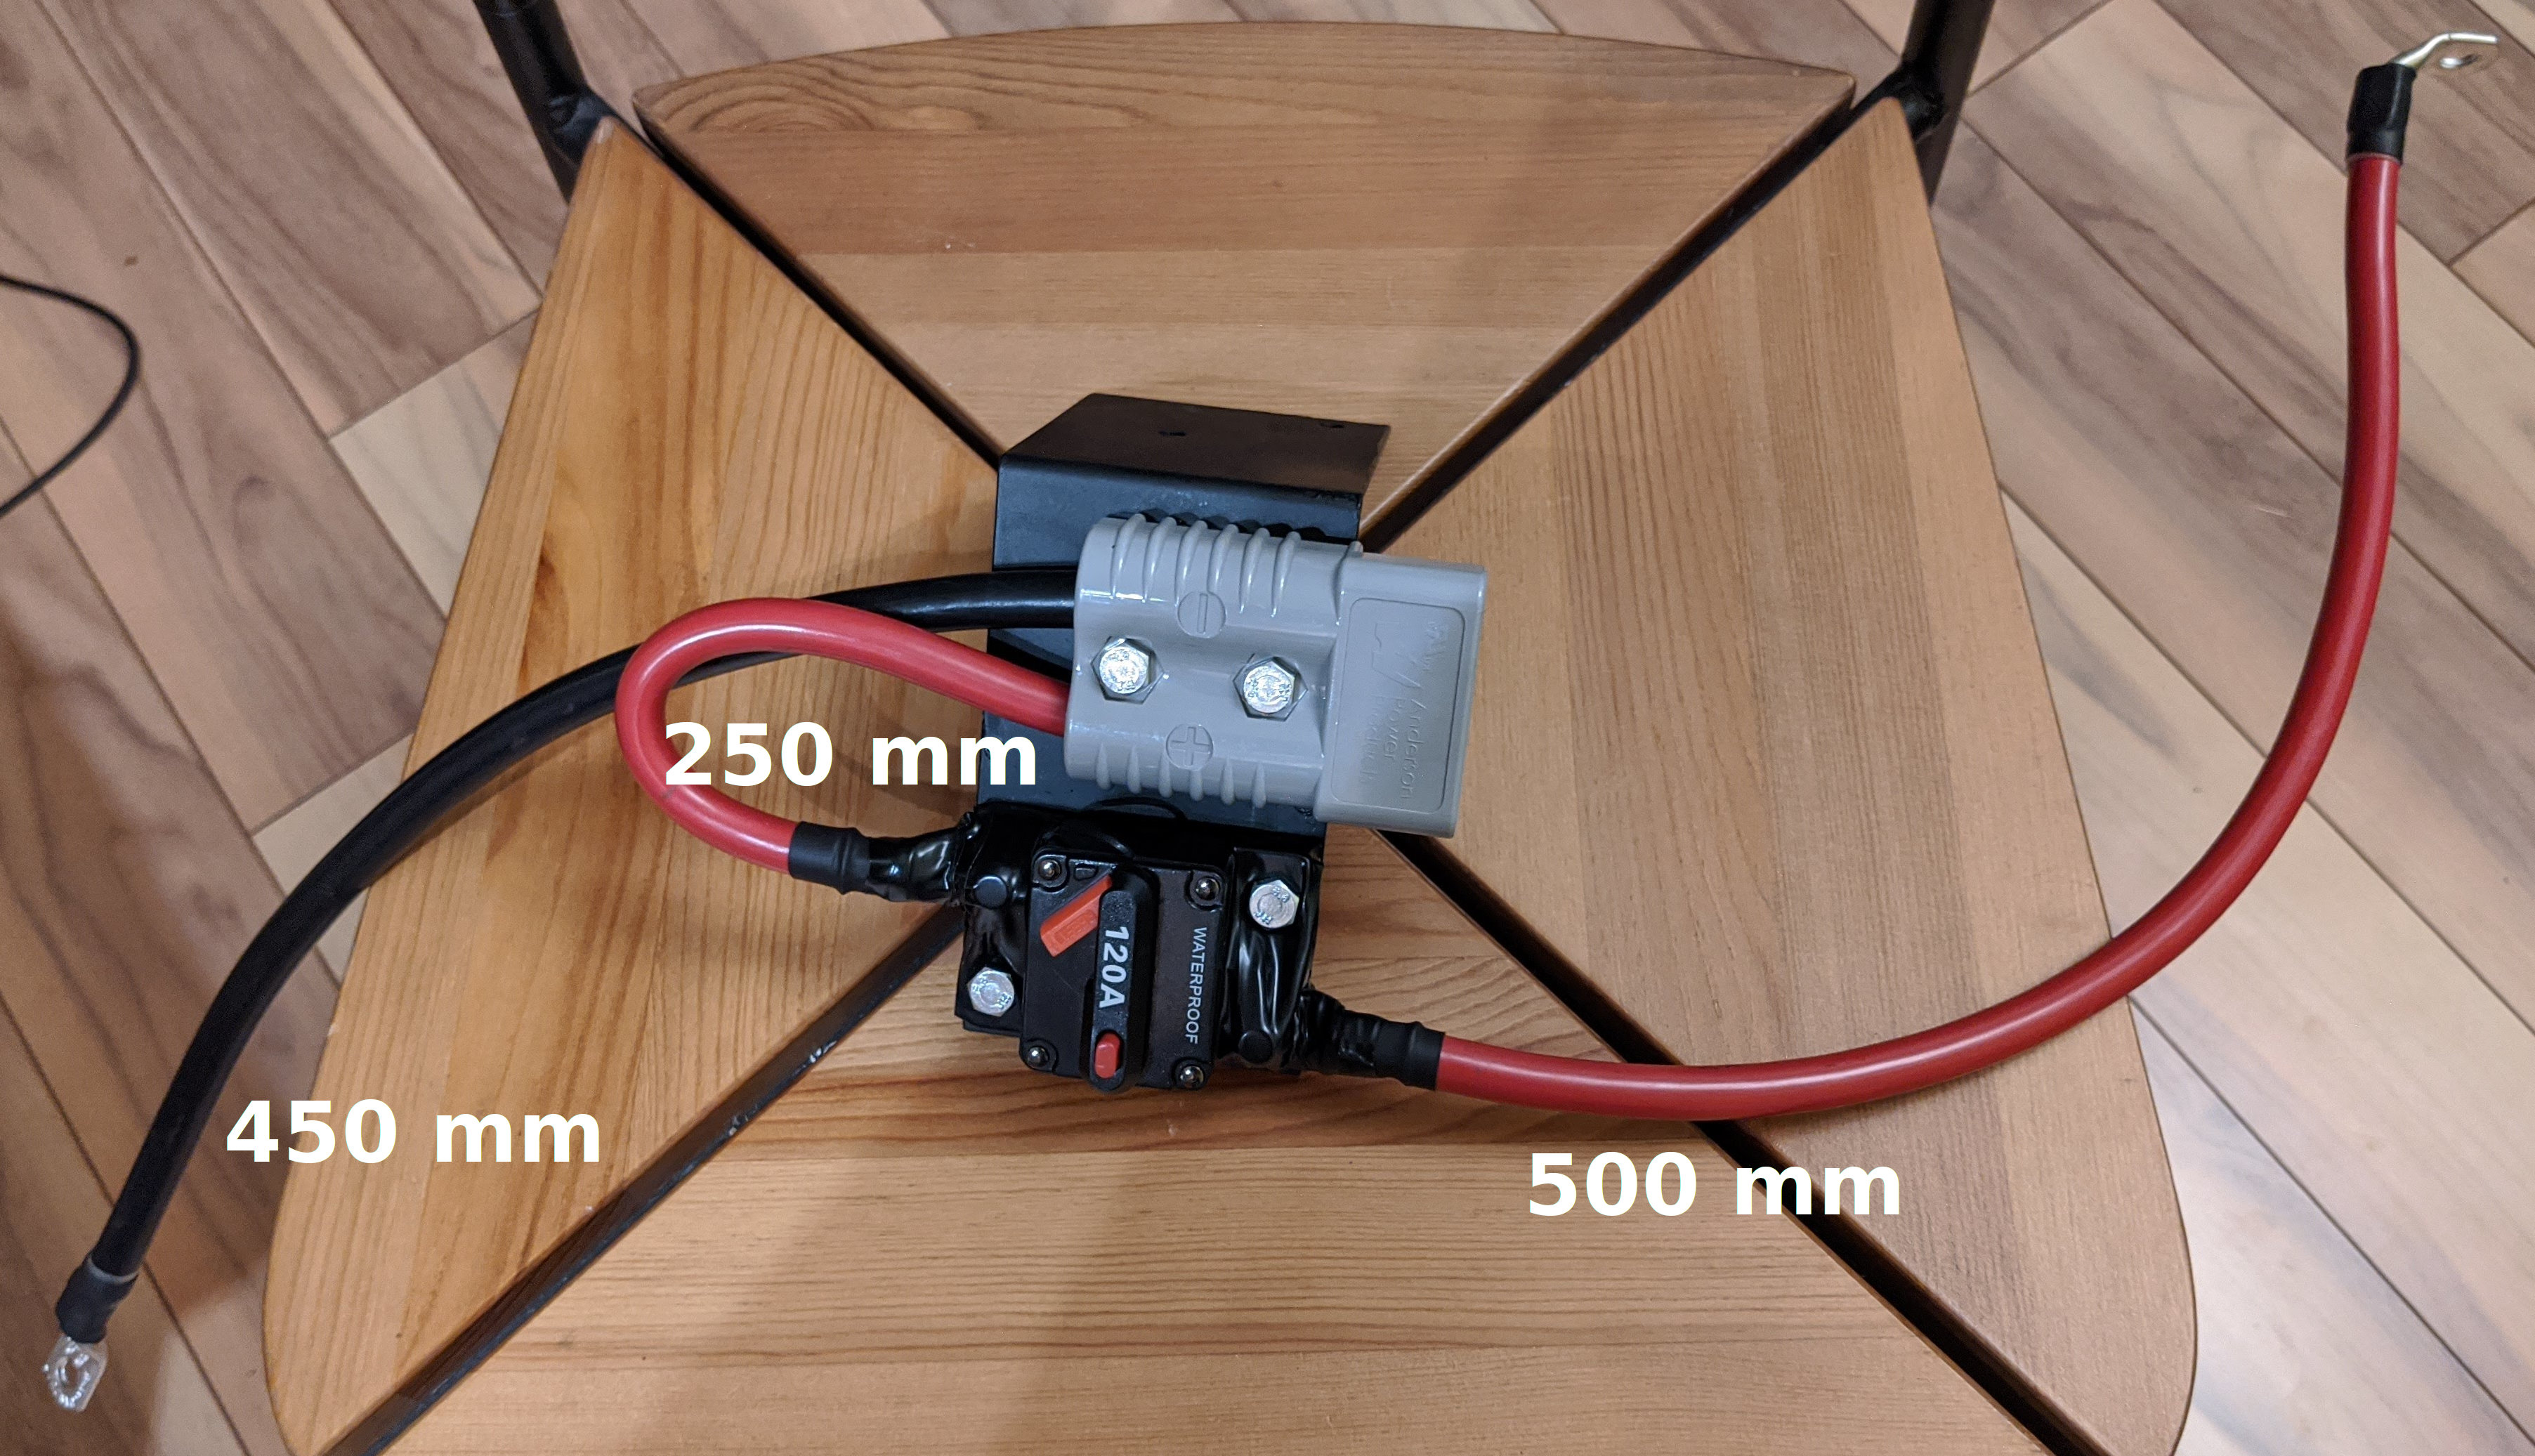
On the circuit breaker, BAT connects to the battery and AUX connects to + on the SB175, while - on the SB175 connects to the vehicle's frame. (I think it'd be a bad idea to connect directly to the battery's negative terminal, because this would bypass the "intelligent battery sensor" mounted there.)
My 1/4" lugs were slightly too large for the breaker, so I used a file to flatten the tips.
You can find 6-50mm² hex crimpers on eBay for around $25. I cut the wires with a hacksaw and stripped them with a utility knife; I'm sure better tools exist.
This is the red jumper wire, before and after heat shrink. The crimping process is standard:
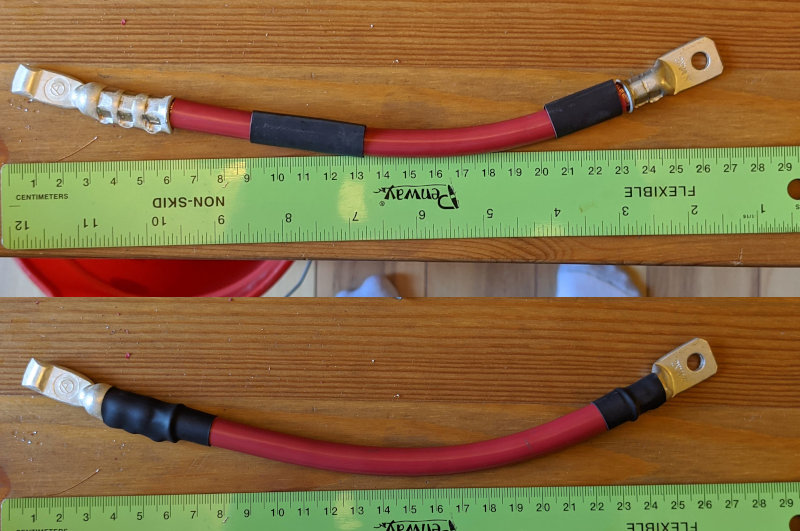
This is the completed adapter with approximate wire lengths. Instead of measuring, I would suggest holding the wires up to the vehicle, and marking the cut points with tape. A similar approach is useful for orienting the lugs.
It's a good idea to cover any exposed red contacts with electrical tape. Note that this photo was taken before I notched the positive lug.
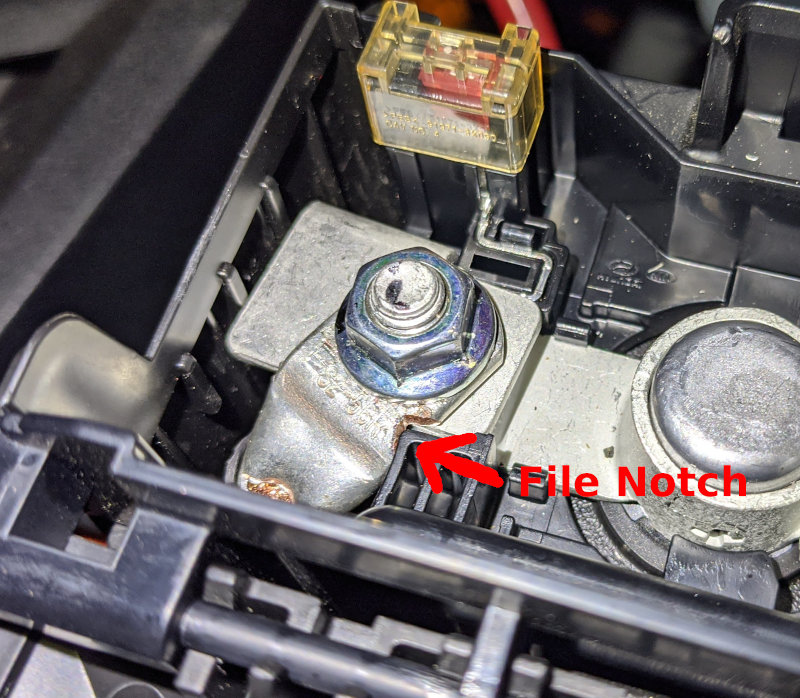
Positive Lug
The most challenging part of this project was fitting the 5/16" positive lug into the battery's plastic frame. Copper is softer than it looks, and I managed to bend the lug 90 degrees using pliers and a small vice. There's also a plastic corner that gets in the way, so I used a Sharpie to mark the collision area, and notched the lug with a file.
I managed to squeeze the bent lug up from the bottom. If all else fails, you could detach the 1/4" lug from the circuit breaker and feed that end down from the top. But it may be tedious (and dangerous) to attach and tape the circuit breaker after it's mounted.
Operational Tips
- Turn on the car, and switch to Utility Mode
- Optional: Turn off the headlights, radio, and climate control
- Lock the doors from inside
- Exit through the driver's door; the car will complain "key not in vehicle" for a few seconds, but continue running
- To lock the driver's door, use the manual key hidden in the fob; nothing else seems to work
At this point, the car should be locked and providing 12 volt power. If someone breaks in, there is no obvious way to switch from utility mode to drive mode without an off/on cycle, which requires access to the key fob.
One might think you could just leave the car off, and let Aux Battery Saver+ top off the 12V battery. Alas, this feature only runs for 20 minutes per 24 hours, just a few watts on average. For loads that small, it's easier to connect a USB charger to the OBD-II port (it's always on, supplied via the 7.5A MODULE 1 fuse.)
Why?
Because it's possible.
I suppose I could use this for blackout resilience, or vacuuming.